Website
Shopify Store
5 Steps Translation Workflow
5 Steps Translation Workflow
5 Steps Translation Workflow
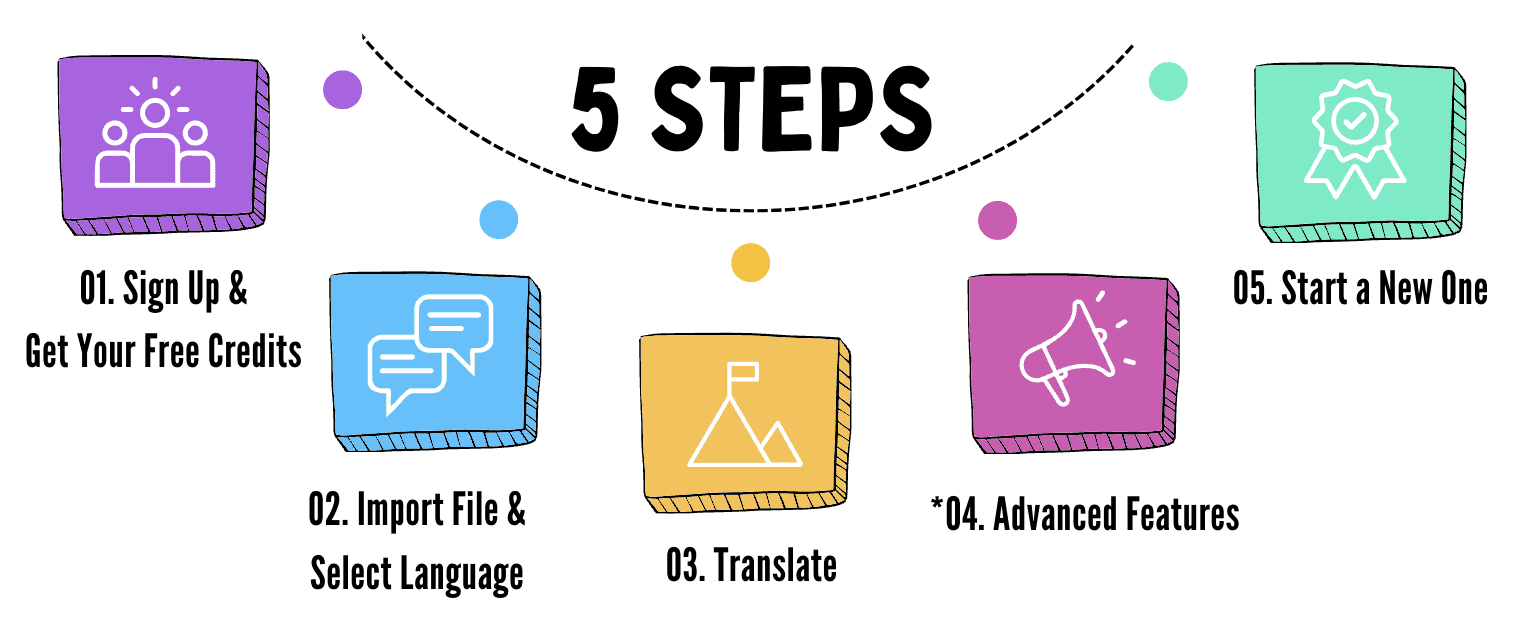
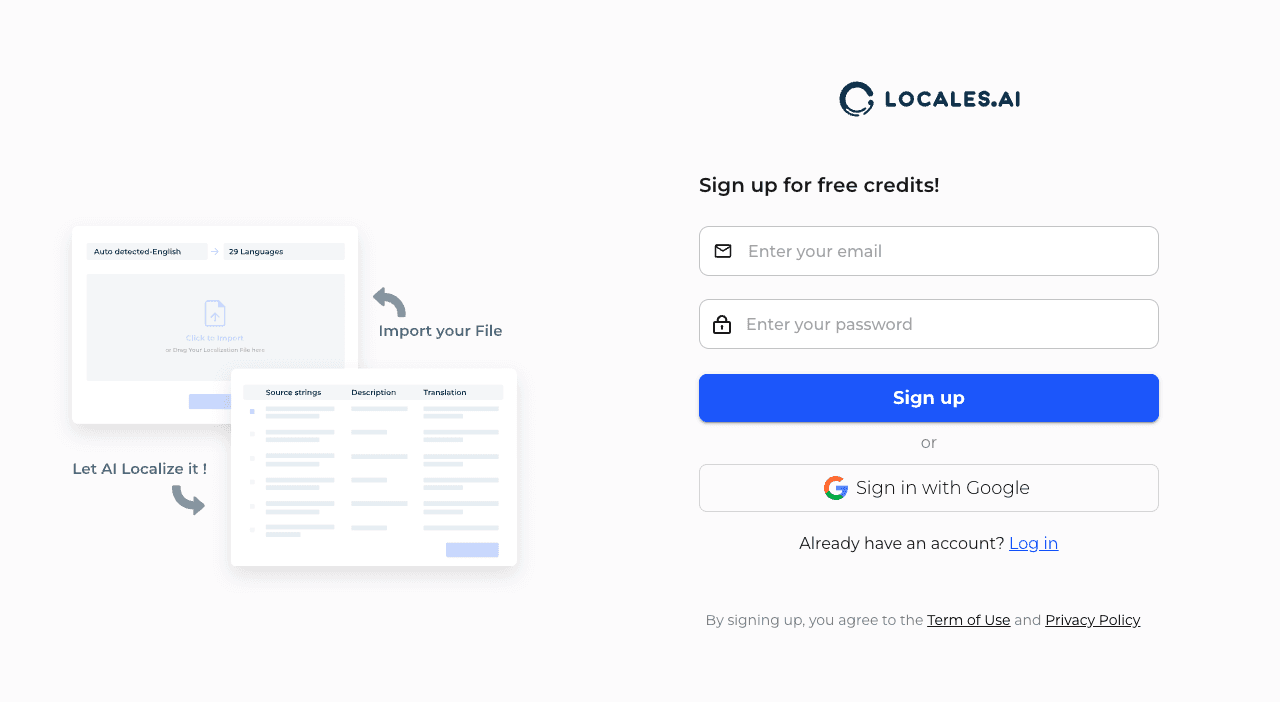
Signing Up
Begin by creating an account with us. Opt for a quick sign-up with your Google Account or use your email to get started. As a new member, you’ll receive complimentary credits for your initial translations.
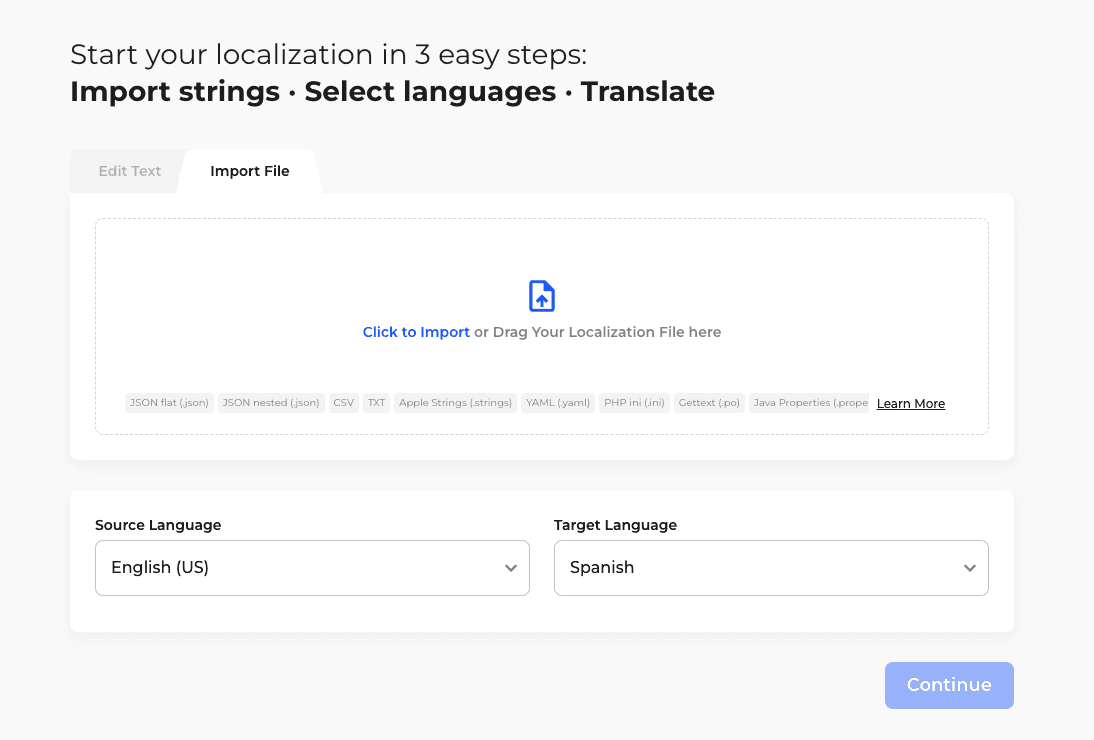
Import Strings and Select Languages
Log in and head to the ‘Import’ section to upload your files, accepting multiple formats. If you’re starting anew, simply input the strings directly into the provided field.
Then choose from our extensive list of 32 languages. Initially, select one language, and you can always add more later.
Translate
After completing the import step, you’ll automatically be directed to our workspace – the String List Page. Here, you’ll be in the perfect spot to select strings and initiate the translation with a simple click on ‘Translate,’ where you’ll be informed of the credit cost for the task.
After translating, you can utilize the search, filter, and sort functions to review your translations. When ready, hit ‘Download’ to integrate the translations seamlessly into your app, website, or service.

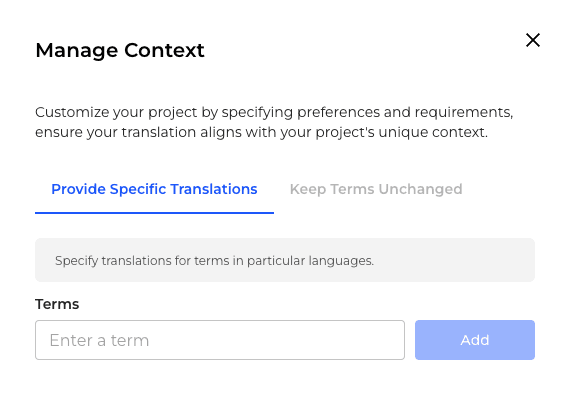
Advanced Features
AI tools: Manage Context
This allows you to set translation preferences, such as specific translations for keywords or indicating terms that do not require translation.
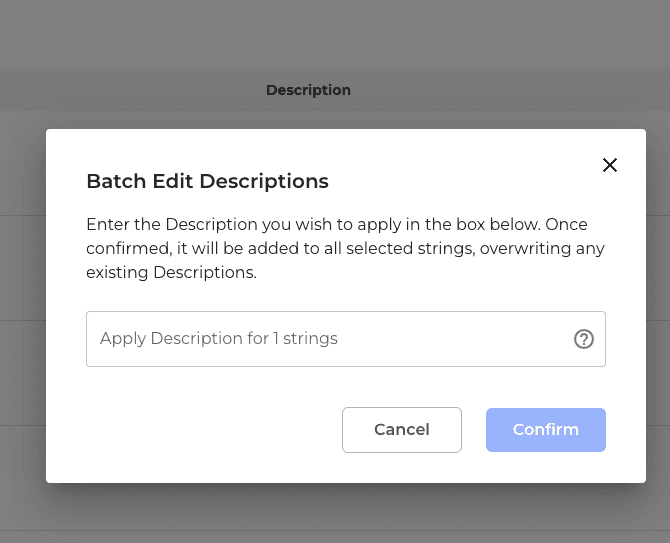
AI tools: Descriptions
You can input extensive details for every single strings. Suggestions include the string’s usage, semantic context, or any information that can assist the AI in producing a superior translation. The Description feature also supports batch input for efficiency.
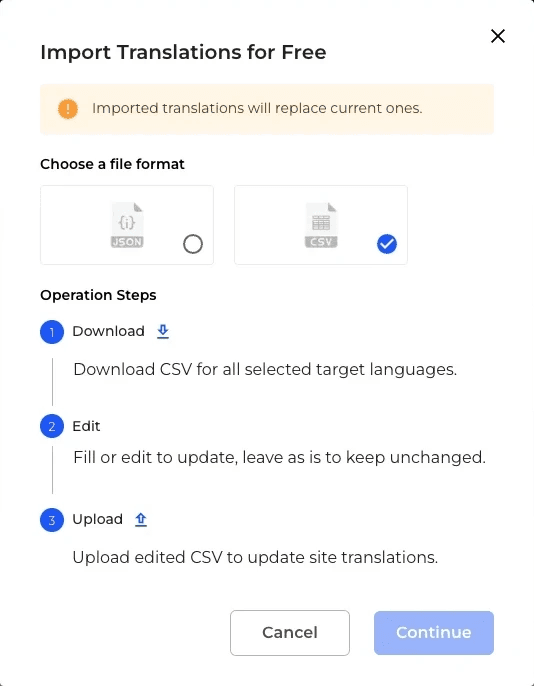
Import Your Translations
For pre-existing translations, click the ‘↑’ button near the Translation column to import them seamlessly.
Start a New One
Add More Languages
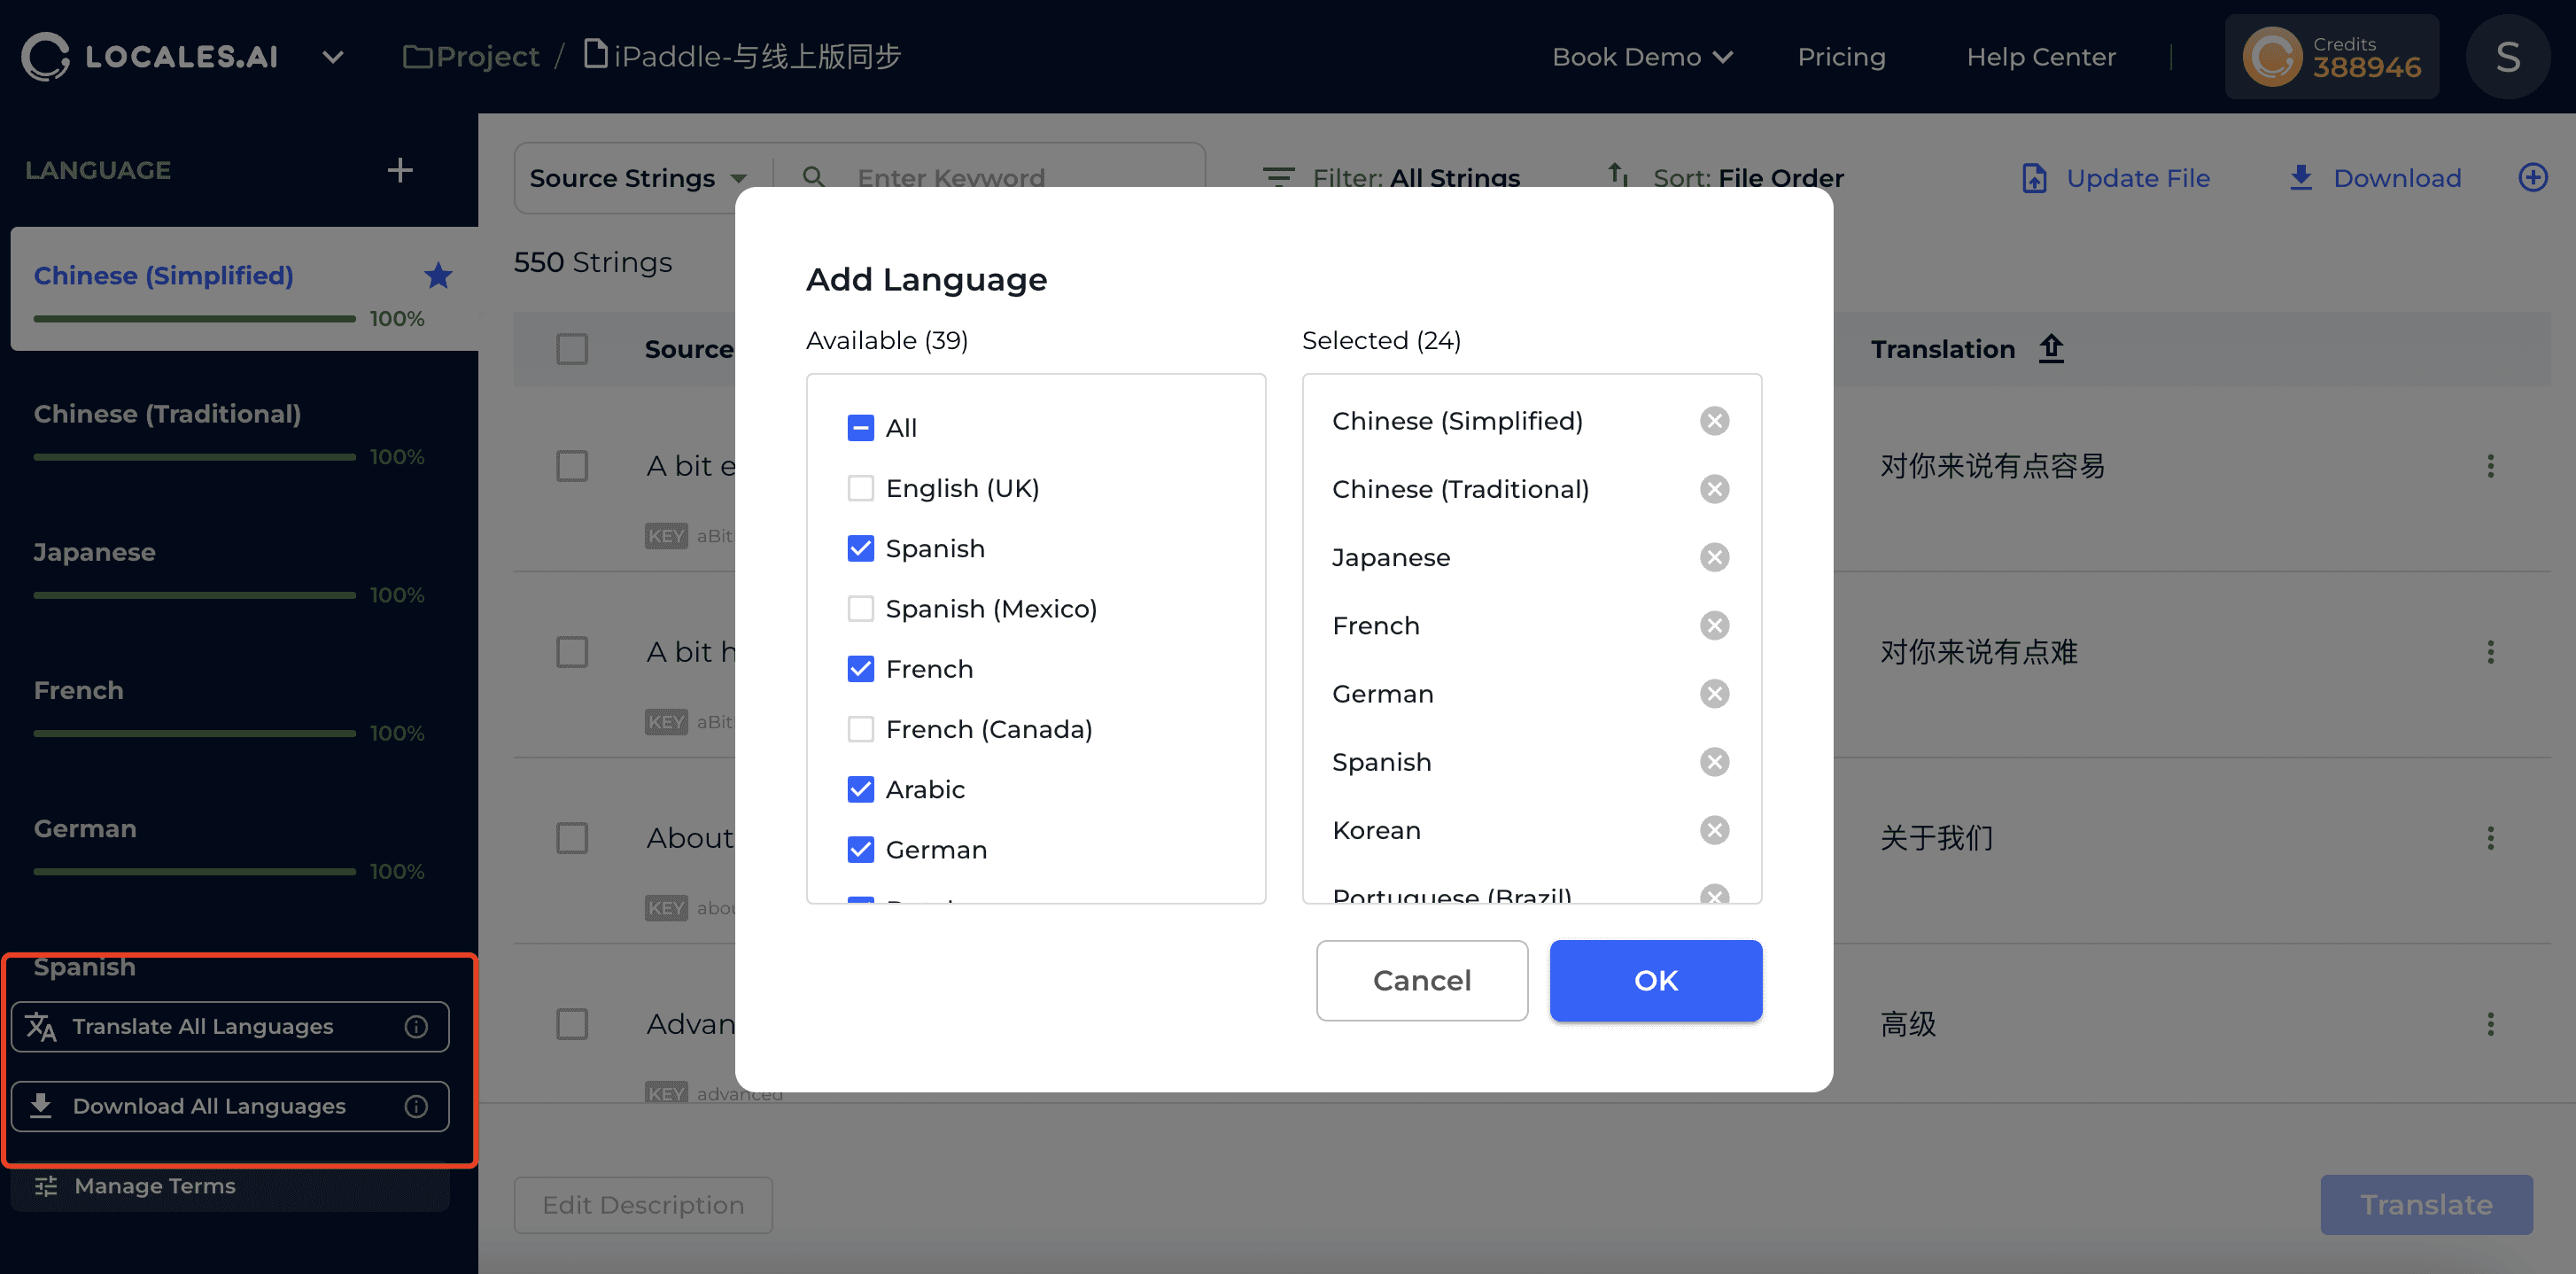
Expand your project’s reach by adding additional languages. Click the ‘+’ sign next to the Language column and select from the popup window.
You are allowed to ‘Translate All Languages’ & ‘Download All Languages’ by one click.
Create a New Project
Upon translation completion, you have the option to visit your Project List to view all projects or initiate a New Project directly. You can also share a project with your team members.
If you wish to continue refining your current document, you can effortlessly update your file, add or delete strings, ensuring your translations remain up-to-date and accurate.
Signing Up
Begin by creating an account with us. Opt for a quick sign-up with your Google Account or use your email to get started. As a new member, you’ll receive complimentary credits for your initial translations.
Import Strings and Select Languages
Log in and head to the ‘Import’ section to upload your files, accepting multiple formats. If you’re starting anew, simply input the strings directly into the provided field.
Then choose from our extensive list of 32 languages. Initially, select one language, and you can always add more later.
Translate
After completing the import step, you’ll automatically be directed to our workspace – the String List Page. Here, you’ll be in the perfect spot to select strings and initiate the translation with a simple click on ‘Translate,’ where you’ll be informed of the credit cost for the task.
After translating, you can utilize the search, filter, and sort functions to review your translations. When ready, hit ‘Download’ to integrate the translations seamlessly into your app, website, or service.
Advanced Features
AI tools: Manage Context
This allows you to set translation preferences, such as specific translations for keywords or indicating terms that do not require translation.
AI tools: Descriptions
You can input extensive details for every single strings. Suggestions include the string’s usage, semantic context, or any information that can assist the AI in producing a superior translation. The Description feature also supports batch input for efficiency.
Import Your Translations
For pre-existing translations, click the ‘↑’ button near the Translation column to import them seamlessly.
Start a New One
Add More Languages
Expand your project’s reach by adding additional languages. Click the ‘+’ sign next to the Language column and select from the popup window.
You are allowed to ‘Translate All Languages’ & ‘Download All Languages’ by one click.
Create a New Project
Upon translation completion, you have the option to visit your Project List to view all projects or initiate a New Project directly. You can also share a project with your team members.
If you wish to continue refining your current document, you can effortlessly update your file, add or delete strings, ensuring your translations remain up-to-date and accurate.

Subscribe our Newsletter
support@agiforge.com
Locales.ai | Driving Global Businesses Growth with AI
Locales.ai 2024. All rights reserved
English
Subscribe our Newsletter
support@agiforge.com
Locales.ai | Driving Global Businesses Growth with AI
Locales.ai 2024. All rights reserved
English
Subscribe our Newsletter
support@agiforge.com
Locales.ai | Driving Global Businesses Growth with AI
Locales.ai 2024. All rights reserved
English